Wednesday, 20 February 2013

Our little house....


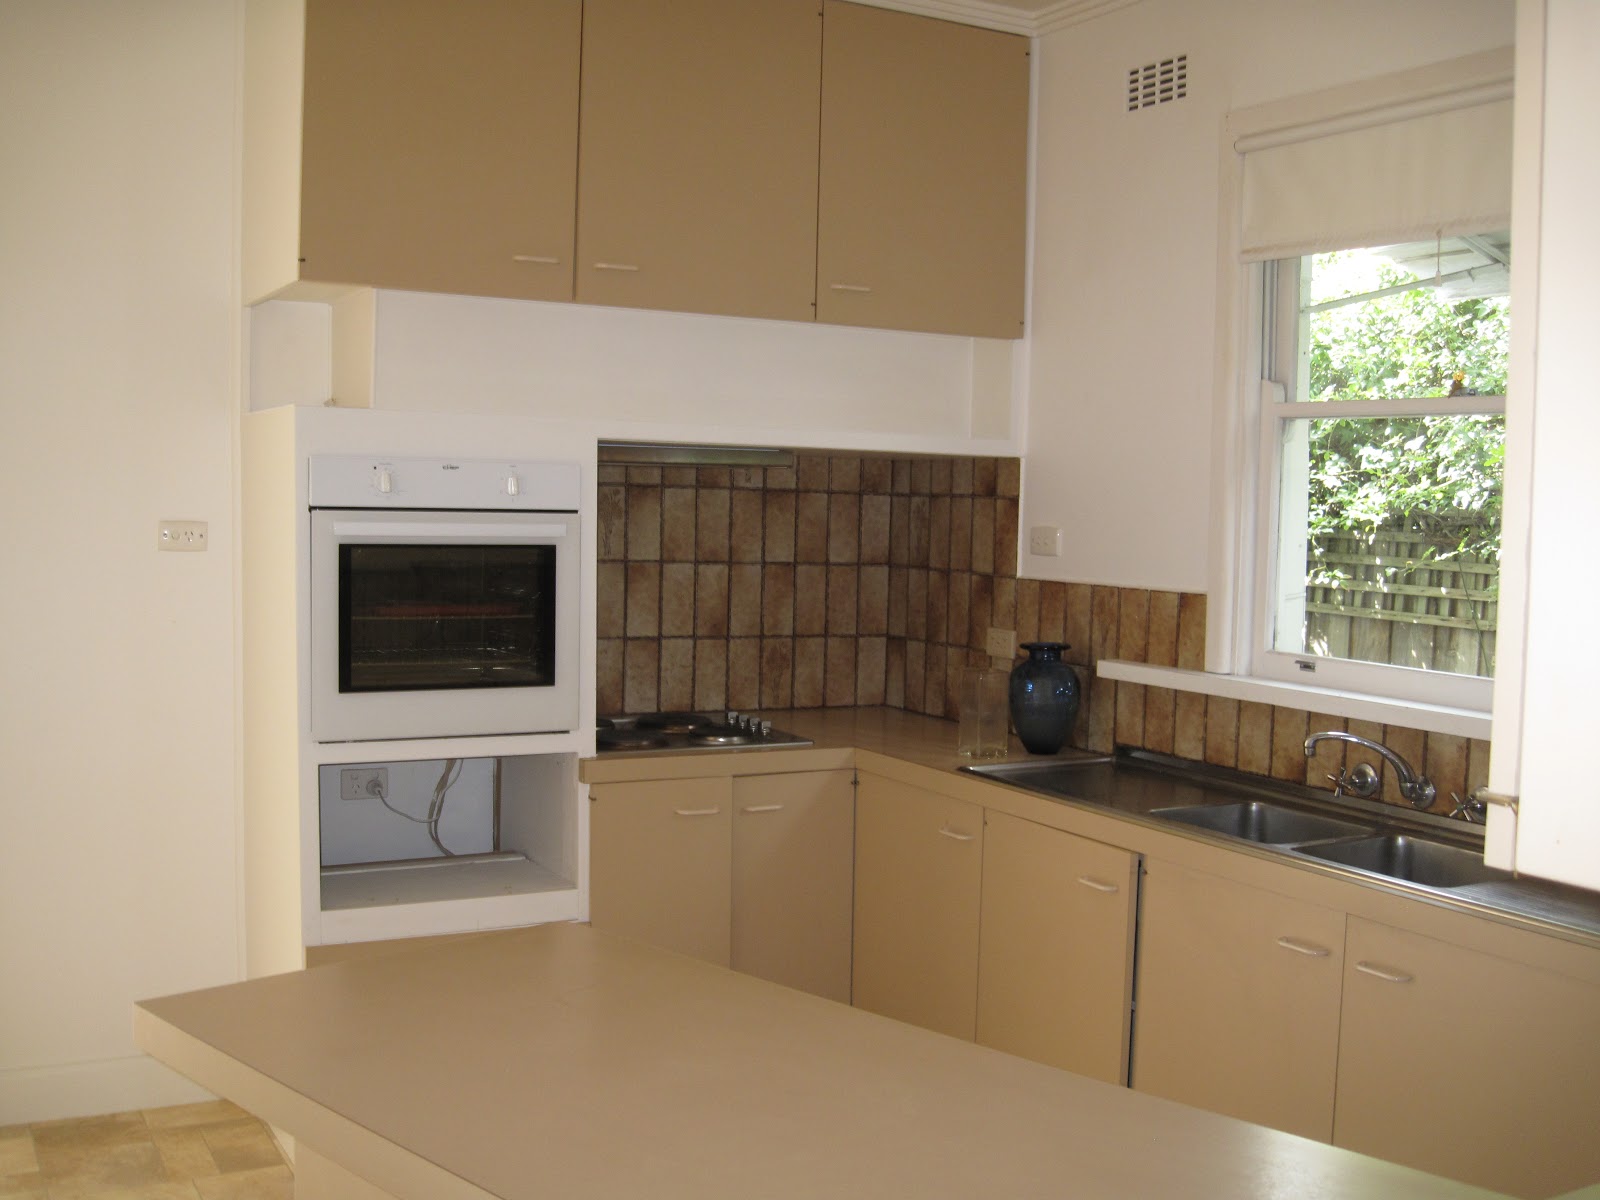
Here is the house that we purchased and settled on in Dec 2012.  A very solid house built by the original owner himself.  Sad that were are making big changes, however we just don't want to renovate and excited about building the Wembley!


Kept these doors and hope
to use as Laundry External Doors


Friends now the proud
owners of this oven.
Saved the trough, think it
will work great in the
garden near alfresco
for parties.
Lights and Fire Grate we sold on eBay
Inside one of the outside sheds


Plan to re-use the gates.


Proposed swimming pool location.


Re-using the old door on the right.

 Out with the OLD........and....


Contract Signing ........ a full day of it!

8th February 2013 was the big Contract Signing day.  After delivering one child to a friends at 8am for Kinder drop off, then 2 more children to another friends for School and Occasional Care Drop Off, we raised over to the Narre Warren office for our 9am Contract Appointment.

This time I came with a stash of chocolates, fruit and beverages to keep our blood sugars well in tact for ALL the information....

To be honest, the day was very full on and frustrating, which is why it is taken me sooo long to get to writing this post.  I nearly forget where we started on the day.

I think we started going through a list of issues we had noted on the plans from when we were at the colours appointment.  We quite quickly hit an issue in that they did not have the prices for us for Casement windows we are wanting to put in the facade instead of awning windows.  DH is dead against awning windows and has been clear about that from the start. It was frustrating as there was 3 weeks between our Tender and Contract and and excuse given that the estimator was away with food poisoning and they were trying to get into his laptop to get the information.  I have to say it is now 10 days later as I write this and I still don't have the pricing!!!!!

We also very much want sliding windows with double-glazing in the remainder of the house (as discussed and written in Tender), however the plans show awning windows.  We were told that the window company can't do double-glazed sliding windows.  This whole window fiasco probably took 1-2 hours of the contract time.  Issues that they could have discussed with us prior to arriving on the day, especially when I emailed them 4 days prior to appointment alerting them to the awning window issue on the plans.  Part of this fiasco was that at Tender, we were told that if we raised the ceiling height of the 2nd storey and put in 500mm high windows, this would alleviate any overlooking issues for us, so therefore we could have the sliding windows.  The window sill needs to be set at minimum 1700mm from floor to avoid this issue.  So at Tender, we agreed that we would go with this solution to get the sliding windows and unobscured glass.  At contract, then told that the window sills were at 1650mm with 600mm high windows and we couldn't make these smaller to the 500mm due to ventilation/light issues.  So by the time we headed off for our lunch break, we were pretty upset with the process.  So much for a 4 hour meeting!

We called Stegbar whilst on the break, they confirmed that the can indeed to double-glazed windows in sliding windows.  Hubby also got their pricing for Casement Windows.  How hard is it PD to give us a price!  

I was given their feedback form to complete whilst on our break - well I had a field day completing that form.  Then one of the Managers had a chat with us and I let him know it all as well!!!

After 2.5 hour break, we were called back upstairs.  Then told that they solved the sliding window issue and we can have 510mm high windows.  Relief from DH at that point.  Still didn't have pricing for Casement windows.

The main time for this appointment was going through questions and issues we had previously identified and could have sorted out before the day.  The actual part of going through the HIA contract was fairly quick.

My husband can't take any more time off work, we needed to get through this all in the day and don't want to hold up application to council.  So we agreed that we would sign the contract and we would do a Post Contract Variation on the types of windows.

We left at 5.00pm very annoyed with how the process went for the day, but happy that things are moving forward...

Stay tuned on how long it takes to get window pricing - I emailed BC today (20 Feb) to chase up............

Electricals

After finishing Colours a little late, introduced to the Blinds Company downstairs, that we quickly exited from, we had 15mins for a food break and re-energise before the Electrical Appointment.  Thank goodness for the coffee shop over the road from Hopetoun.  Advice for anyone else attending these appointments - take some snacks and energy food to keep you going through the appointments.  

We got stuck into the Electrical appointment and to start with they only had our generic plans.  I confirmed that the Colours team had our actual plans and it would be best if we used our plans as their were considerable changes downstairs.  Our Consultant did manage to find our plans and then re-loaded them into the system, this took about 15mins, however I would rather that then finding mistakes later on after they transcribed them.  Their computer program is also new (1 month into it) so they are still learning and it was having problems.  Luckily our consultant kept saving our changes as we went through so we didn't lose information.  Someone next door apparently lost about 1 hours work and they had to start again!

The process was pretty easy though.  We went in with our own plans all marked up where we wanted everything.  Originally we thought we would just get batten lights put in where we wanted downlights as we thought that they cost around $200 a downlight.  However the downlights were only $125 (8W, cover up to 1.5 metres).  If we put in batten lights, it was around $48 a light plus $15 to offset the light position off the actual batten - therefore a total of $61 per light.  We would then have to get an electrician in to replace all the battens with the downlights and purchase downlights, so we decided to just to the downlights through PD.

Note - the downlights can not be dimmed.  I looked in a brochure the other day and if you want to buy downlights that dim, these alone cost around $100 each.  Perhaps replace what we need down the track.....

Here is some pricing to help others out:
Downlight LED GU10 White - $125.84
Under cupboard Lt Triangle lights - $130.90
Recessed Step lights - $123.20
2-way switches - $55.44
1 socket pp - $40.04
2 socket pp - $43.12
4 socket pp - $80.08
Weatherproof socket pp - $107.80
Kitchen Island socket - $107.80
TV arial points - $55.44
Phone Socket - $77.00
Data Socket - $77.00
Ceiling Exhaust Fan - $200.20
Doorbell - $170.00
Light Batten & Nogg Future Ceiling Fan - $104.00
Light Batten & Nogg Future Feature Ceiling Light - $104.00

So by the end of the appointment, it all adds up very quickly, however at least you get to see the running tally as you go!

Sunday, 10 February 2013

Colours, colours, colours.....


Monday 4 Feb - Off to Hopetoun in Port Melbourne.....

9.00am and straight into it with our colours consultant.  

Started with the exterior selections, working our way through doors/handles/locks.  I had spent weeks researching the neighbourhood and taking photos of houses.  I got paint pots of our final 3 render colour choices and painted big pieces of paper and stuck them on the outside window for us to look at for a few weeks to see what we liked.

This is our result for the Exterior:

Main Render - Dulux Stephney 
Feature Render - C/B Monument - front projection and pillar 
Colourbond Roof - C/B Windspray 
Gutters/Fascia/Downpipes - C/BWindspray
Windows - White 
Eaves - White
Garage Door - Panelmasta Contemporary - C/B Monument 
External Timber Beams and Posts on Alfresco - Monument


Front Door:
PMAD 106 with Obscure Glass and Nexion Vision Element L3 Lever Handle.
Door will be painted Chocolate Cherry - we were hoping for Dulux Red Box, but unfortunately had limited colour choice here - tried to get brightest red available.  
Being brave for a touch of a feature.....


Internal Doors:
Corinthian Deco3, painted white used on some of the downstairs internal doors, all other internals just plain.
Velocity Element L3 Lever handle used on all internal doors (standard), a few with privacy locks.


Internal Colours:
All internal paint will be - Wattyl Alabaster (shown here)
Trims all white - First Snow 6301


Kitchen:
We are inspired by this picture....


So selected the following:
Glass Splashback - Dulux Mangrove Leaf - full length behind stove and up behind the rangehood.
Stone Benches - Essa Stone Crystal Chalk with 20mm square edge (Cat 1) -  (new range for PD)
Island Bench - 40mm edging
Laminate doors - White, natural finish, standard lamiwood doors
Kickboards - Formica brushed aluminium
Handles - went with standard handles, we carefully selected the size with some handles I found that I like at Masters (took the handles with me to measure them up)
Flooring - Bolero Rustic Coffee Timber Laminate


Blanco 1 1/2 Bowl BJ8SL sink (standard)

Blanco FD9085WX 900mm

Blanco BRC90BX 900mm

Laundry:
We will have an extended benchtop the whole width of the laundry which is tiled above it.
In the photo below here, you can see:
Colorado Grey stone tile - floor tile
Cafe Cino Matt - wall tile (300mm x 100mm)
Laminated bench top - Formica Velour Silver Strata
Cupboards and Doors - White
Laundry Trough - Everhard 45L insert Trough S/S 
Laundry Door - No. 7 clear glass
Taps - Armada Wall Top Assembly (standard)


Bathrooms/Ensuite/Powder Room:
Benchtops - Essa Stone Crystal Chalk  (cat 1)
Basins - Valentino 420 stepped vessel (not in guest ensuite - will have standard there)
Basin taps - standard (will change later)
Shower taps - upgraded to Raymor Mixer instead of 2 taps in showers.  Raymor is cheaper than the Caroma one (can change later)
Toilets - Raymor Andorra CC suite - Back to Wall (upgrade - $34 each)
Cabinets - Licorice Linea in vertical grain (horizontal is an upgrade and expensive one!)


Upgrade - Ensuite & Bathroom
Standard basin - Guest Ensuite
Raymor Mixer - upgrade is from 2 taps to Mixer

Flooring:
Bolero 'Rustic Coffee' Timber laminate floor - this will be throughout the whole of downstairs - except for Guest Bedroom/Rumpus/Wet Areas.


Carpet - we are in a dilemma - not that impressed with choices, so need to finalise what we will do - our options here are:
  • Go with Cat 1 carpet - replace in a few years after young children have trashed it.
  • Go with Cat 3 carpet (80% wool) - $3000 extra - shown below
  • Don't get carpet through PD and then get it done ourselves after handover.  Would then need to see costings of the Bolero is both are part of promo pack.


Some other photos of options around Hopetoun....


This is one of the ranges of Laminex!

Examples of types of Cupboard Doors you can select.

Lifestyle range basin choices - standard on left, upgrades graduate towards the right.

Types of Glass Glazing i.e. Front Door

Standard Range of Handles

Upgrade Range - Cat 2 - ~$5 each extra


Thursday, 31 January 2013

Tile Appointment

After 3 visits to National Tiles, a huge amount of research on the Porter Davis Website, the Tile Boutique, visits to Display Homes and reading many Forums and Blogs, I was pretty nervous driving to the tile appointment today as this is the one thing we hadn't quite squared away in our heads.  DH and I was slightly in 2 different minds on some selections.........

I arrived 30mins early to have another look at selections and look up some of the referenced tiles I had read on other blogs.  By the time our Consultant arrived to start the appointment I had 5 large floor tiles out and a few feature type tiles.  The only tile we had worked out prior to coming was the Caffe Mocha 100x300 (Standard tile) that we want to use for the Laundry splashback in a brick laid fashion.  We had thoughts of utilising this in the Main Bathroom also around the bath and perhaps one wall in the shower.

First though, here are some pictures of the main walls of tiles.  Apologies, I didn't take pictures of the feature tile areas.  Hope this helps any newbies.


Standard (Cat 1) Tiles
Top Row - various types of white tiles
2nd Row - Rectangular feature tiles - some 100mm x 300mm
2nd Bottom - 333mm x 330mm
2nd topBottom Row - Portofino Matt 450mm x 450mm
Upgrade Tiles (Cat 2 & 3)
As you move along the wall from Right to Left,
the costs increase.
Included here - Portofino Gloss 450mm x 450mm,
I believe these are around $5/m2 extra
Others here are up to $35/m2 extra
Upgrade Tiles (Cat 4 & 5)
As you move up to the left, there are the lovely Porcelain
Tiles around $65/m2 - 600mm x 300mm and 600mm2

So we started working with the Laundry as we felt this was the easiest room to sort out.  Looking at the main floor tiles we had out, we actually worked out that the Cafe Latte tile colour was not right, so ended up selecting - Cafe Cino Matt (MAXFL008), this is a little darker and slightly cooler colour.

After a LOT of discussion, we decided on one consistent floor tile for all our wet areas - Colorado Grey Natural 450mm x 450mm (NT11-530FL).

NB: We have chosen Alabaster as our internal Wattyl Paint Colour.

This is what we came up with:

Laundry
Cafe Cino Matt tile along the full splashback length and also at the side of the laundry sink (this is extra).  Lay in a horizontal brick bond pattern (this has a slight increase in price).
Colorado Grey Natural on the floor.

Main Bathroom
Colorado Grey Natural on the floor, the shower and then right across the back of the vanity, between the mirror and the bath, wrapped around the wall above the bath.
The niche in the shower, the bath hob and the bath top will use the Cafe Cino.

Guest Suite
Colorado Grey on the floor, vanity splash back and the short sides of the shower.
Cafe Cino lay brick bond on 1200mm width of guest shower as main feature with a high window on this wall. 

Toilets upstairs
Colorado Grey on the floor.


The Cafe Cino Matt tile is sitting on the Colorado Grey tile, so a little hard to distinguish the exact colours.


Powder Room Downstairs
Colorado Grey on the Floor
Feature Tile as the splashback - Greywood G/M White Glass Random (DSSTM417)

Ensuite

Colorado Grey on the Floor
Greywood G/M White Glass Random splashback behind vanity and inside our shower niche.


See - that wasn't so hard now was it.  In fact we had it all selected in 1hr 45mins!

Note - we are opting for laminate flooring, so didn't need to do main floor tiles.